Showing posts with label Anne Ross Oliva. Show all posts

Saturday, May 8, 2010

Sculpting the Moon


Okay, I forgot to mention it last time, but I'm sure you're way ahead of me and you thought of it yourself: you need to put eyelids on the other eye! Did you do that? If not go ahead and to that, same way as below. Oh, but do look at the eye on the other side so that they relate to each other. They don't have to match exactly (ours don't), but they do have to relate. Our moon probably won't be viewed straight on very much. In fact he'll look a bit funny from that angle, but we still want his eyes to relate. Trust me.


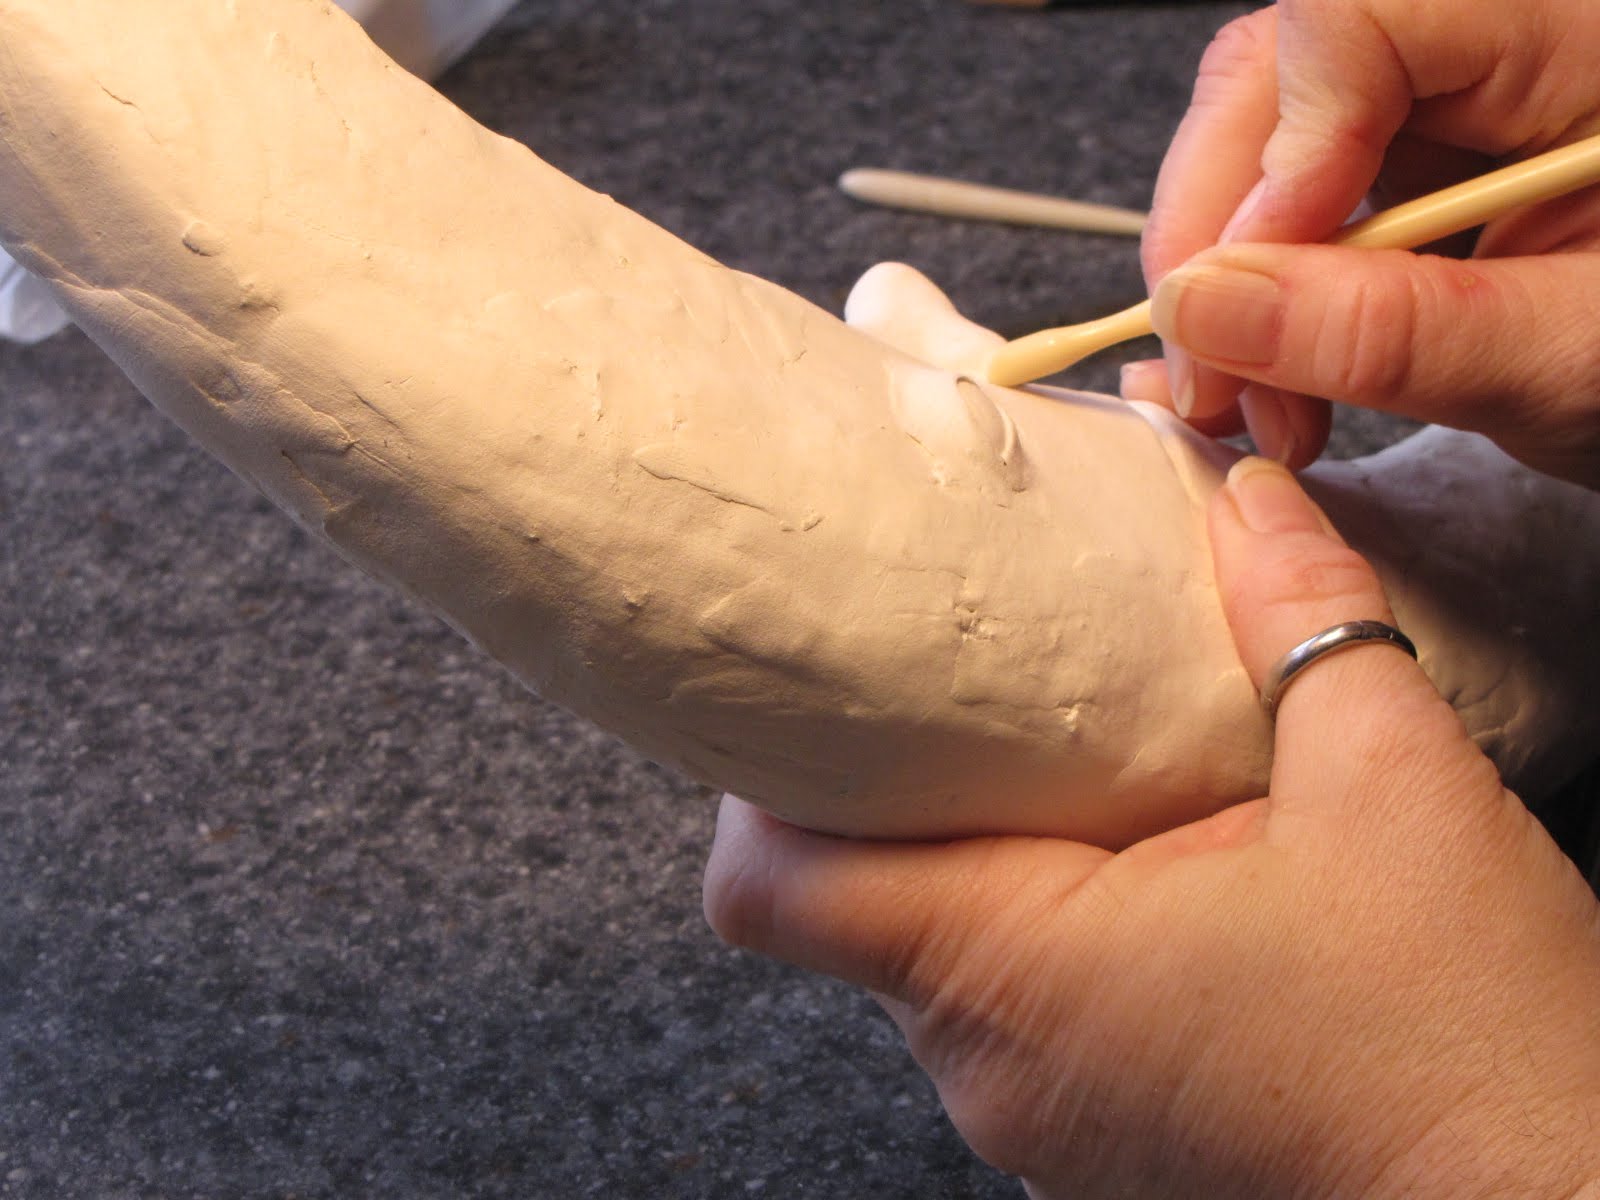
Now that that's done, we'll move on to the chin. Pinch off a chin-sized hunk of clay, and begin to shape it with your fingers. Again, it's sort of a C shape. Put it against your moon to see how it's going to fit and adjust accordingly. When you are happy (or close enough to happy) with it, wet the chin area with your finger and press the chin in place. Smooth the outer edges with your fingers. You'll probably be fine using just your fingers for this step; no details to worry about.




Tuesday, May 4, 2010

The Moon Continues


It's been awhile, but part of the fun of working with Creative Paperclay is that we can come back to it at any time (even years later!) and just pick it up and go on, so lets do it!


It's time for eyelids, upper and lower. We want a wide, C shape, not very thick, for the upper lid. Shape the clay, try it out to see how it fits. You can always cut some away with your X-Acto knife if you have too much. When you're happy with the shape wet the area above the eye with your finger and press the eyelid onto the moon. Use your fingers and tools to smooth the clay and shape it on the eyeball. You want a clean edge on the eye, check you own eyes in a mirror for reference.


Take a smaller piece of clay for the lower lid. The lower lid has a bit of a curve, but it's generally not as pronounced as the upper lid. Keep the clay thin, if it's too thick your moon will have puffy eyes. Again, once you have the clay in a shape you like, wet the area on the moon with your finger, place the clay and smooth it with your tools and fingers. Smooth out the edges of the clay as much as possible so you don't have to fight them later.


The moon has eyelids!


Thursday, April 15, 2010

Who Sculpted the Moon's Nose?


Now, the nose!


Pull a hunk of clay out of the bag. It's going to take a little practice to be able to gauge how much clay you'll need to make a nose for whatever size face you're working on, but not to worry, you can always add or subtract to, or from, whatever you have pulled out! Use your hands to begin shaping your clay into a nose. It's going to be triangular shaped, flat backed, very thin at the top. Again, look at your nose in a mirror if that helps.


Use your finger to wet the nose area on the moon and press the nose onto the space. Smooth out the edges with your fingers. Use your tools to put detail into the nostrils and the flesh around the nostrils.

Who Sculpted the Moon's Nose?


Okay, the nose is done, we'll let it dry!

BUT. Do you see the problem with the eyes? They're not in the right place; too low and at an odd angle. They're sitting where the cheek should be! I'm adding the picture with the odd cropping, it's more obvious in this one. In the next post I'll show you how easy it will be to fix them (the magic of working with Creative Paperclay!).

Wednesday, April 14, 2010

Who Sculpted the Moon?


Hey!


I'm working on a 15" hanging crescent moon, with a face, want to come along?


It's Creative Paperclay over a Styrofoam base. I cut a large circle of Styrofoam into a crescent shape and covered it with a thin coat of clay. I've already put flat-back egg shapes on each side of the crescent in the area where the eyes will be (in fact, these will later become the eyes!).


Oh, by the way, if you haven't worked with Creative Paperclay before you have to keep it in an air tight container. It starts to dry immediately. I use a zip-top baggie; a quart size one holds a pound of clay perfectly. Also when you are adding clay to clay, or clay to any surface for that matter, you must wet the clay (or the surface) first. If it's clay just dampen it, too much water will give the clay a mealy texture.


There are two ways of sculpting the face (or anything for that matter),; you can sculpt one feature at a time, allowing for drying time before adding the next feature; or you can sculpt wet into wet with no drying time between features. There are pros and cons to both methods. The former gives you more control, but it takes longer of course. The latter is more spontaneous, but it is so easy to "mess up" what one has done when one is working on top of wet clay. For this moon we're going to sculpt a feature and allow it to dry before adding another. Since it's two-sided there is too much opportunity to "mess up" what we've already sculpted.


First take out a hunk of clay (reseal the baggie) and start to shape it into an upper lip. If you haven't done much sculpting keep a mirror handy and use yourself as a model. See how your upper lip is shaped. Not just the lip, but from your mouth to your nose, the whole section.


Figure where the lip should go. It's okay to draw the layout of the face on the moon with a pencil if it helps, it won't show when we're done. Dip your finger in water and wet the area where the upper lip is going to go. Press the lip onto the moon and smooth the upper and side edges. Use a tool to shape expression into the lip.


For sculpting I prefer antique manicure tools that I find at antique stores and flea markets. But one can also find good sculpting tools in the clay aisle at Michaels (and other craft stores) or on-line from Dick Blick. You can also get some wonderful handmade tools, for a reasonable price on etsy at http://www.amcreatures.etsy.com/


Now, take another hunk of clay, shape it into a bottom lip. This should include the lip and the face under the lip down to where it meets with the chin. The lower lip will have to follow the shape of the upper lip. Wet the space under the upper lip with your finger and press the lower lip onto the moon, smooth the edges down.


Use your tool to shape the expression. You can change the expression a lot at this stage, but be careful not to overwork it, you'll never get a natural expression if you overwork the mouth. Again, it helps to have a mirror handy so you can check your own lips for expression.


Prop your moon up so it can dry without smashing any of the hard work you've done!


Wednesday, April 7, 2010

Creative Paperclay


It's my favorite medium for sculpting.


Why Creative Paperclay you ask?


What's not to like?


It's easy to work with - It air dries, no kiln, no oven needed.


It's forgiving - You can change what you've done even after it dries, just cut off the part you don't like, wet the area you're going to add new clay to and start over!


It's versatile - It can be sculpted into faces, hands, rocks, walls. It can be draped for cloth. I've made figures ranging in size from 1.5" to 4.5' tall.


But most of all, for me, it's the surface when it's dry; it's just like paper (as the name implies?). I can draw on it with pencil, or paint it with watercolor or acrylic. It can take a wash or heavy coverage with paint, or the white clay can stand on it's own.


I love it. If you haven't tried it I highly recommend it.

Saturday, March 27, 2010

Hello to the morning


First thing in the morning, when the light is soft and the house is quiet, I take my coffee into the studio. I sit and look at what I did the day before and think about what direction today should take. No extra light. No extra sound. It's bliss.

Friday, March 26, 2010

So many ideas, so little time....


Time is going way too fast these days. Is any one else feeling this way?

I have so many ideas and so much I want to do, but before I know it the day is over and I haven't gotten as much done as I had planned in the morning. About a year ago I got a "real" job; this seriously cuts down on my studio time, which, in turn (naturally),cuts down what I'm able to accomplish - BUT, it doesn't affect what I WANT to accomplish!

Here's a partial list:

1. Teach again. - Long ago I taught portrait & pastel workshops. I miss teaching, but now I'd like to teach sculpting and mixed media. Specifically sculpting in Ceative Paperclay, more people should learn how to use it!
2. Learn how to teach on-line. - This intrigues me.
3. Do an art show this fall. - It's been too long!
4. Build a body of work - for said show and for a gallery show.
5. Publish some work. - (Had some work published over 10 years ago, nothing recently).


I am working towards some of these goals and have made some progress, I'll post more about them soon.

Those of you who are also struggling to balance studio time with a full-time job and family obligations, how do you doing? Any tips? What comes first for you?

Saturday, February 13, 2010

What to do today.


It's a gray, cold (for Florida) morning and I'm looking at the stuff on and around the work table in my studio. I'm not sure what I want to do today; not feeling ambitious.

There are some bits and pieces that were unearthed during the studio overhaul that could turn into something interesting, perhaps today is the day to start looking at them. Or it could be the day to read a good book.......

Saturday, February 6, 2010

An Outing!


My friend Cindy and I went to the Mount Dora Arts Festival today. It's been years since I've been to an art fair as an attendee, not an exhibitor. What fun!


It was a beautiful day, although if I had had a booth set up I would have been a bit concerned about the wind. BUT, the sun played hide and seek with the clouds and kept the temperature from climbing too high. The crowds were incredible, it was hard to get through the streets. I don't know if people were buying anything, but it was nice to see so many people out enjoying art and the day. It made me long to do a show again and I plan to jury for one for this fall.


I haven't exhibited in an art fair since 2008, when I did the American Craft Council show in Atlanta and Mainsail in St Petersburg, Florida. Both are wonderful shows, but my sales just didn't cover expenses for either venue and I had to make the decision to get a "real" job. Never an easy choice to make, but sometimes it's necessary. In the past I have found that these times can be a time of growth and change in my art work and I look forward to seeing where this time will take me.


Today confirmed that I do want to do a show this year. I miss the sights, sounds and, yes the smells (who doesn't like the smell of kettle corn?) of an art show.

Saturday, January 30, 2010

The Littles


Here, at long last, are the little pieces that rose from the ashes (dust?) of the studio cleaning:

The dish and spoon stayed pretty simple: they're running away on a background drawn with watercolor pencils. Their line from the nursery rhyme, torn from a tattered story book, has been added to the canvas.

The little flower fellow is a bit more complicated: He got a silver crescent moon and a brass #2. I also decided to put a small keyhole on his canvas and I wanted some to be peering through the keyhole. I chose a photo of a very dear friend who has taught me much about the flora and fauna of Florida. I just happened to have a great picture of her taken when she was a child. It seemed appropriate to use Clauda's picture on this piece and when I reduced her to an extremely small size she fit perfectly inside the keyhole! I attached a vintage key to the copper wire on the flower.

I finished both pieces with simple wooden frames, a great technique from Claudine Hellmuth's book, "Collage Discovery Workshop" that I use a lot.

What do you think?

Sunday, January 17, 2010

Winter Cleaning


I know, we're supposed to do spring cleaning, not winter cleaning. But since moving to Florida eight years ago winter seems to be a better time to do deep cleaning. It's when the weather's mild - usually - and the windows can be open. It just feels like the right time down here.


I've been doing a bit of winter cleaning in the studio, sorting through shelves and storage bins, weeding out things I can give way or list for sale on etsy.


One happy result of deep cleaning in the studio is rediscovering pieces in various stages of completion that for one reason or another got set aside. Some will pique my interest again and I set them out on my work table. When this happens I rarely finish the piece as I had originally intended; there's a new vision now.


Recently I came across this tiny plate and spoon, along with their equally tiny arms and legs. Originally I had planned on doing a piece depicting the entire "Hey Diddle Diddle" gang, but lately I have been enamoured with small works, so now the dish is going to run away with the spoon alone. I painted the faces and put stripes on the wee arms and legs. Then I wired the extremities to the bodies to give them motion. They'll go on a 3X3" canvas, something else will go on the canvas with them, not sure what yet. I'll have to let you know.


I also ran across this little baby in a hollyhock. He was already painted. In fact the hollyhock was glued to a pinback. Apparently at some point I went though a very strange pin-phase that I'm now blocking...... Anyway, the hollyhock fellow has now been coated with beeswax and attached to a beeswax coated 2.5X3.5" canvas, then wrapped with copper wire. Not sure what else will go on his canvas either, but I'll put both finished pieces in a future post.


In the meantime I'm looking forward to seeing what else I might find in the boxes and bins and what ideas these finds might spark.......


Friday, January 8, 2010

New Books!


Don't you love getting a gift certificate? I do, especially a gift certificate for books or art supplies.


Recently I was given a Barnes & Noble gift certificate. After savoring the thought of it for a few weeks the day finally came when I had time to browse and consider my selections. These books can't be chosen in haste after all, they are gift books, they must be chosen carefully!


From the front door I spied a huge book on the history of the circus.....in the sale section!! I love old circus pictures. Several oddities have been inspired by the vintage circus look; in fact there is a circus piece in the studio right now that could use some inspiration.


After looking through the circus book - yes it did look promising, but a decision can't be made that quickly - I headed back to the arts & crafts section. In addition to checking out the books in general, there were a few I wanted to look at in particular: Rice Freeman-Zackery's "Creative Time and Space: Making Room for Making Art". I also wanted to see "Who's Your Dada" by Linda and Opie Obrien and "Image Transfer Workshop" by Darlene Olivia McElroy and Sandra Duran. I was especially interested in Rice Freeman-Zackery's book. I have her "Living the Creative Live: Ideas and Inspiration from Working Artists" and I follow her blog and listen to her podcast, and I enjoy all of it, BUT, her book wasn't in stock. The other two books were available for my perusing pleasure; both looked good, especially "Who's Your Dada?". But, way up on a high shelf I spied "Art Making and Studio Spaces" by Lynne Perrella. Now, when it comes to other artist's working spaces I have to admit, I'm a bit of a voyeur. I must not be alone given the number of magazines on the subject that have cropped up in the last year or two. I generally find the magazines unsatisfying though; the spaces often look too decorated, too pretty for real work.


After finding a ladder I got the book down and thumbed through it and saw true work spaces.....enough to satisfy my voyeuristic tendencies! A book chosen!!


Back to the sale section to look at the Circus book again. It had some great pictures and illustrations - lots of inspiration there - so it had to come with me too.


A quick pass through the magazines; too many possibilities to list, but only one came home with me: "American Style". The article about collectors Jerry Slipman & Chet Robachinski caught my eye. Whenever I'm asked to speculate about what I'd do if I won $100 million in the lottery I say I'd become a collector of art and fine craft. "American Style" showcases collectors whose homes and collections I'm usually thinking of when I say that, like Slipman and Robanchinski's.


My gift certificate was well spent I think, don't you agree?


Thursday, December 31, 2009

Blue Moon


There's a Blue Moon tonight. My favorite art work of my own is titled "Blue Moon". It was conceived at the American Craft Council, Sarasota, Florida show, in 2002. My business name was Silver Moon Studio. Across the aisle was a potter who called his business Blue Moon Studio. During the course of the show he explained that he and his wife (and fellow potter) had found their farm in upstate New York, with a pottery studio already built on it, on the day of a blue moon.


I was sitting in my booth thinking about a blue moon being the second full moon in a month when it occurred to me that, no, it would simply be a very sad moon. I did some quick sketches right away and had intended to share them with you, but I have misplaced the sketchbook I was using at the time. Anyway, I did not follow the sketches very closely. I very rarely do. The piece didn't come to fruition right away; I finished him in 2006.


He was sculpted in Creative Paperclay with a wood and wire armature. His clothing was also made of paperclay with acrylic paint and silver leaf. I knew that he would be wear all shades of blue with some purple. I didn't plan on the red tie. It was a last minute decision. It was his choice and it is out of character for him, but he wears it any way because it was a gift from the sun.


"Blue Moon" is living in the Atlanta area. He found a new home when we were there for the American Craft Council Show in March 2008.


Happy New Year!

Wednesday, December 30, 2009

Magic


Are you familiar with the work of painter Chuck Close? I had the pleasure of seeing some of his work at the Salvador Dali Museum in St Petersburg, Florida, a few years ago and I was enthralled.


For those of you who don't know, he does facial studies on a huge scale. From a distance they are realistically painted faces - his early work was photo realistic - but up close they turn into a grid of abstract squares. They change as one walks across the room. There is a definite element of magic.


There are a couple of programs about Chuck Close that the Sundance and Ovation TV channels (PBS too?) show, check them out if you get a chance. In addition to telling about Mr. Closes' life and some of his philosophy, they show him creating his magic. I watched Chuck CLOSE, a Film by Marion Cajori last night. I could watch it over and over. Between interviews the film follows the progress of one painting.


There are clips of the artist working and as the the camera pans in and out you can catch that moment of magic where abstraction turns into light or shadow on the plane of a face.


I find it thrilling. Perhaps you will too.